As I begin to get more comfortable with the 3D printer that I've been messing around with, courtesy of Airwolf 3D, the process becomes more exciting and challenging. Kind of like that average kid in class that finally starts to find that groove, I'm nowhere near proficient, but I'm able to screw up a whole lot less. This project was all about designing a bridge that could withstand the most weight while using less than 50 grams of the ABS filament that the printer is loaded with.
Before all of you engineers and physics champions criticize my design, it was a relatively fast build (about 90 minutes) and I just wanted to have something to test out by the end of the day. On top of that, I didn't know how crazy I could get, knowing that the restriction that I placed on it was a maximum of 50 grams of filament.
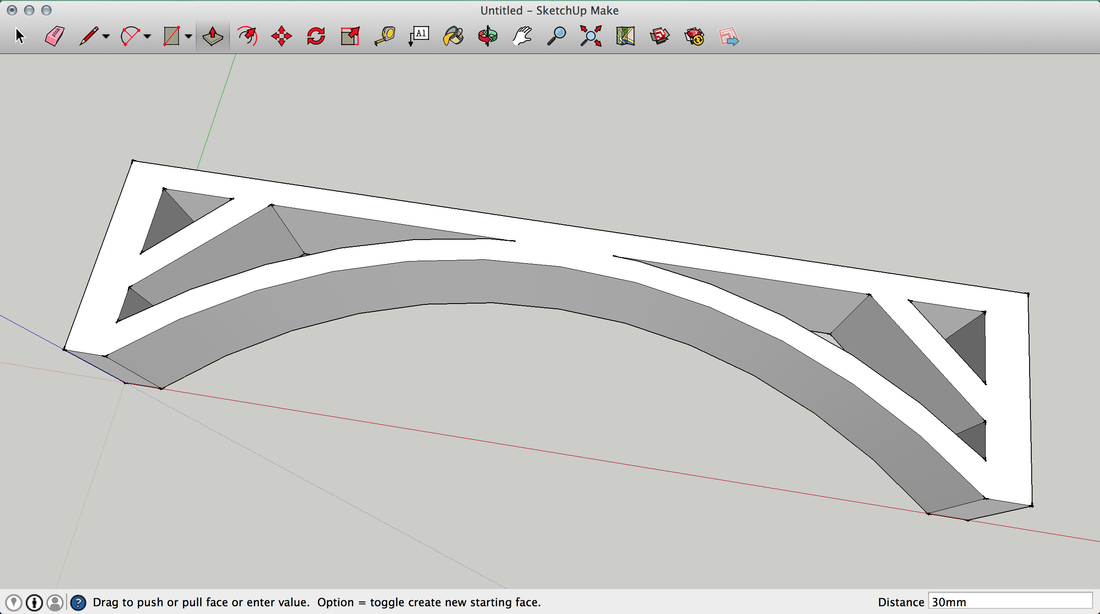
After exporting it as an .STL file and opening it in Matter Control, I had to go in and manipulate the drawing. Truth be told, the picture above is my 4th try, justifying why it took so long. The first sketch that I created was well over the threshold, using 117 grams of filament. Oops! Another component that helped out was that I changed the fill percent to 15% to limit the amount of filament that was being used inside the bridge. In hindsight, I might have gone up a little bit more. Either way, it was time to print.
After exporting it as an .STL file and opening it in Matter Control, I had to go in and manipulate the drawing. Truth be told, the picture above is my 4th try, justifying why it took so long. The first sketch that I created was well over the threshold, using 117 grams of filament. Oops! Another component that helped out was that I changed the fill percent to 15% to limit the amount of filament that was being used inside the bridge. In hindsight, I might have gone up a little bit more. Either way, it was time to print.

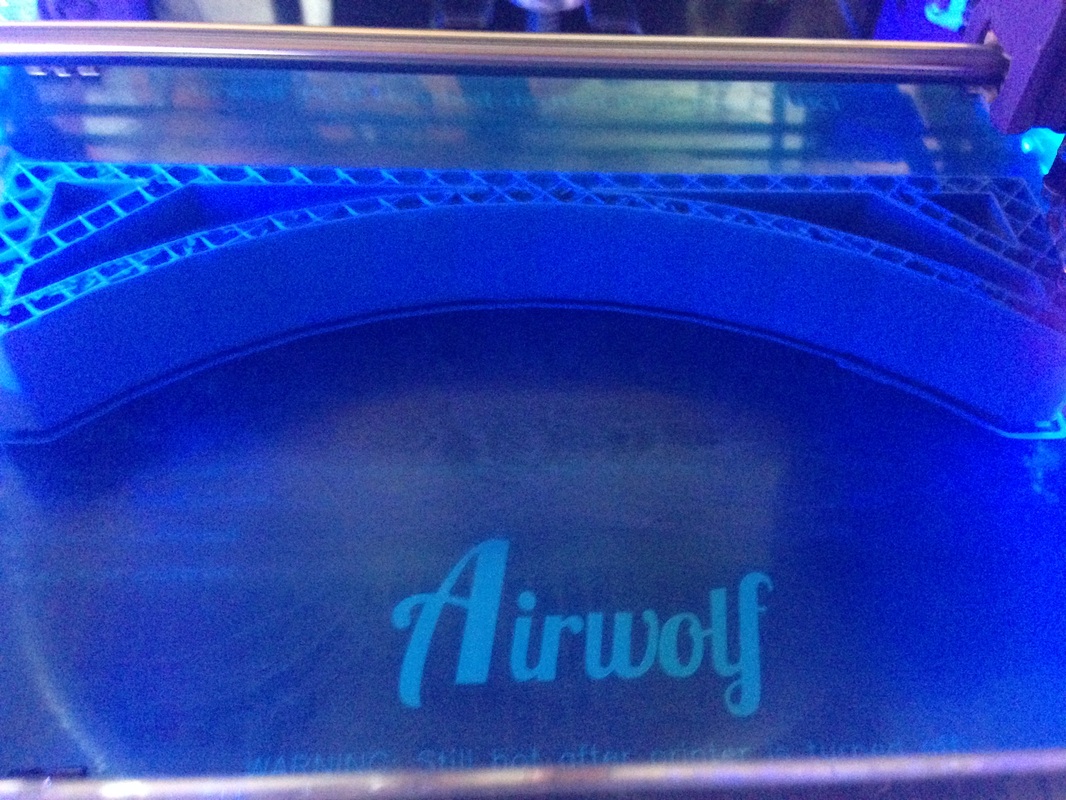
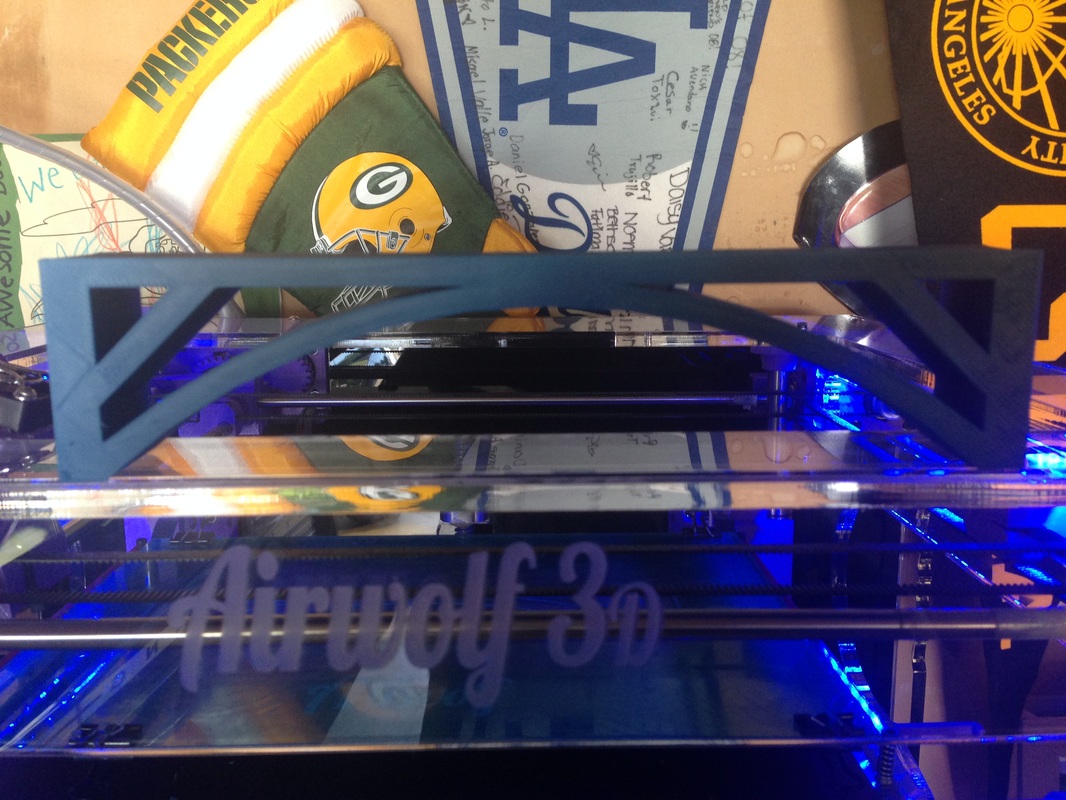
The final product turned out a whole lot cleaner and refined than my previous builds. Once again, this is a good feeling after getting pretty frustrated with some poor prints. I didn't apply too much glue and I waited until it was hot and ready to print before applying the glue.
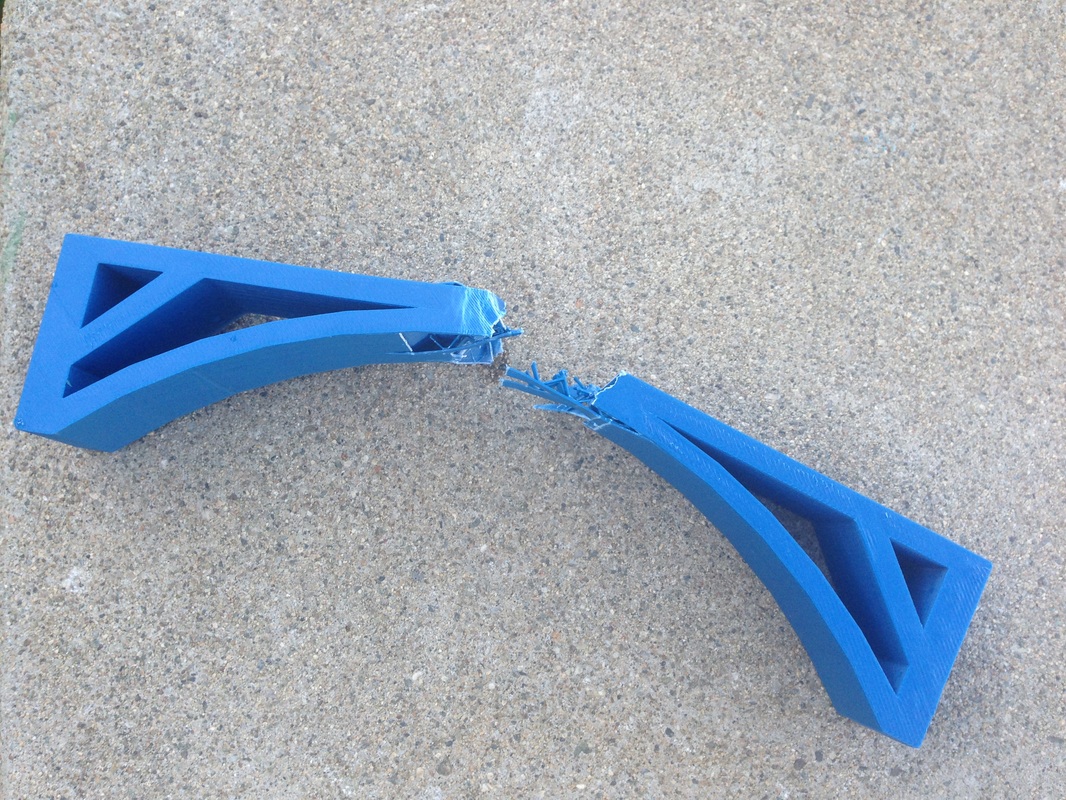
Once the bridge was printed, it was time to test. This was kind of a bummer, knowing that it will be my shortest-lived project to date. I mean really, I was going to be destroying something that I spent 6 hours creating from start to finish. Regardless, for the sake of modeling and building a lesson plan, this had to be done.
I had my two (not-so)trustworthy helpers, my two boys, take the supplies to the back yard where we would simulate the stress test on the bridge. They obliged, but not before they grabbed the hose, chased a lizard, and tried to take each other's toys away from each other. Boys. Yes.
I had my two (not-so)trustworthy helpers, my two boys, take the supplies to the back yard where we would simulate the stress test on the bridge. They obliged, but not before they grabbed the hose, chased a lizard, and tried to take each other's toys away from each other. Boys. Yes.
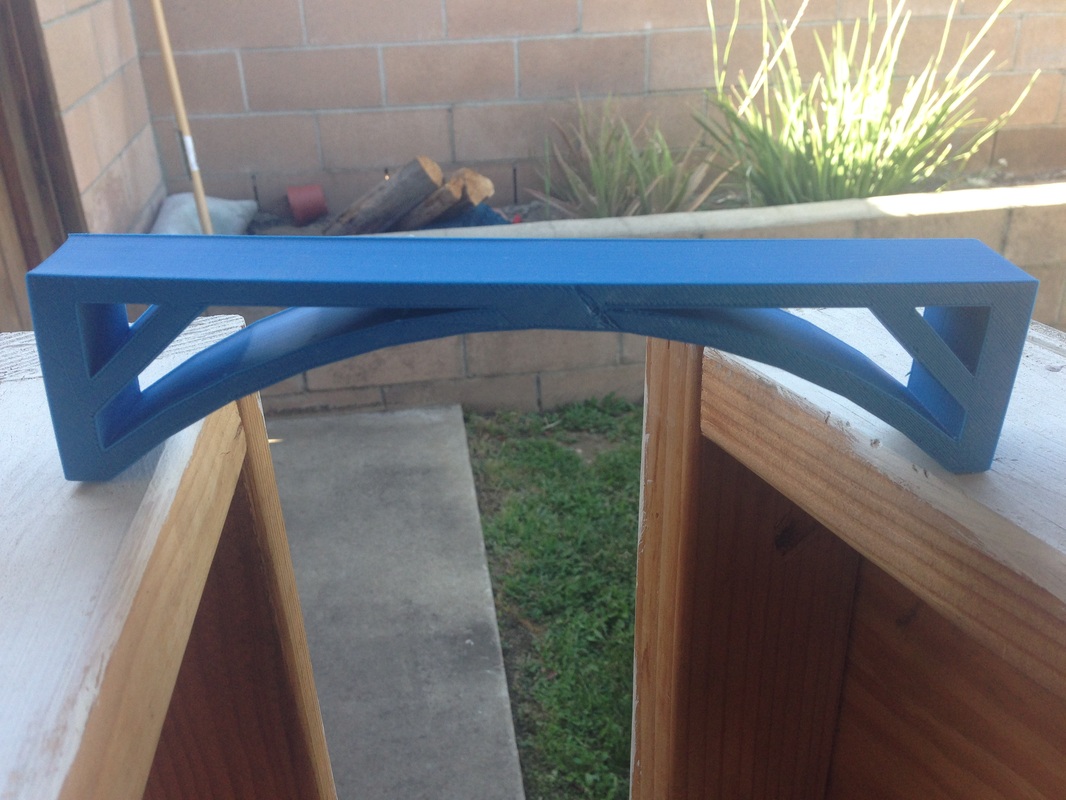
We set up the bridge on top of two cornhole boards. If you don't know what that is, it's a great game. However, in this instance, business needed to be taken care of. The bridge was propped up, then clamped down onto the boards. This may have compromised the test a little, but I needed to make sure that the bridge didn't slip before reaching its failure point. Either way, here is a video of what happened next (Thanks to Andrew Stadel for always taking really cool videos of estimation 180 tasks. I tried, but my kids were, well, kids):
We took a measuring cup, one at a time for the first half of filling the bucket, and dumped them into a 5 gallon bucket. As the video shows, the bridge was able to support 43 cups of water. Next up was determing how much weight that actually was. Knowing that 1 gallon of water is approximately 8.345 pounds, and there are 16 cups in a gallon, this led to some basic calculations.
1 cup = 0.522 pounds
43 cups = 22.427 pounds
Negating the weight of the bucket and the string (for the sake of time and ease and not wanting to buy a more precise scale than my bathroom one), this bridge was able to support 22.427 pounds of weight. Not too shabby for a first timer!
Again, thanks to Andrew for helping inspire the video and estimation portion of the lesson. Also, thank you to Frank Noschese and Steph Reilly for helping me out on the Twitters to find the appropriate standards that hook on to this lesson.
@Jstevens009 @mgolding @reilly1041 pic.twitter.com/qOg1BvQXJc
— Frank Noschese (@fnoschese) June 18, 2014
It was a sad day to see my project crash and burn, but it sure was a fun one to build something and test it out with my own kids.
Happy Broken Bridge Fishing
 RSS Feed